


MySQL Python: About MySQL
- MySQL is a fast, easy-to-use relational database. It is currently the most popular open-source database
- MySQL is used for many small and big businesses. It is developed, marketed, and supported by MySQL AB, a Swedish company. It is written in C and C++.
- MySQL is an open-source database, so you don’t have to pay a single penny to use it.
Download MySQL
Follow these steps:
-
Go to the official MySQL website
-
Choose the version number for the MySQL community server that you want.
MySQL Python Connector
MySQL Python Connector is used to access the MySQL database from Python. You need a database driver.
MySQL Connector/Python is a standardized database driver provided by MySQL.
To check whether the mysql.connector is available or not, we type the following command:
>>> import mysql.connector
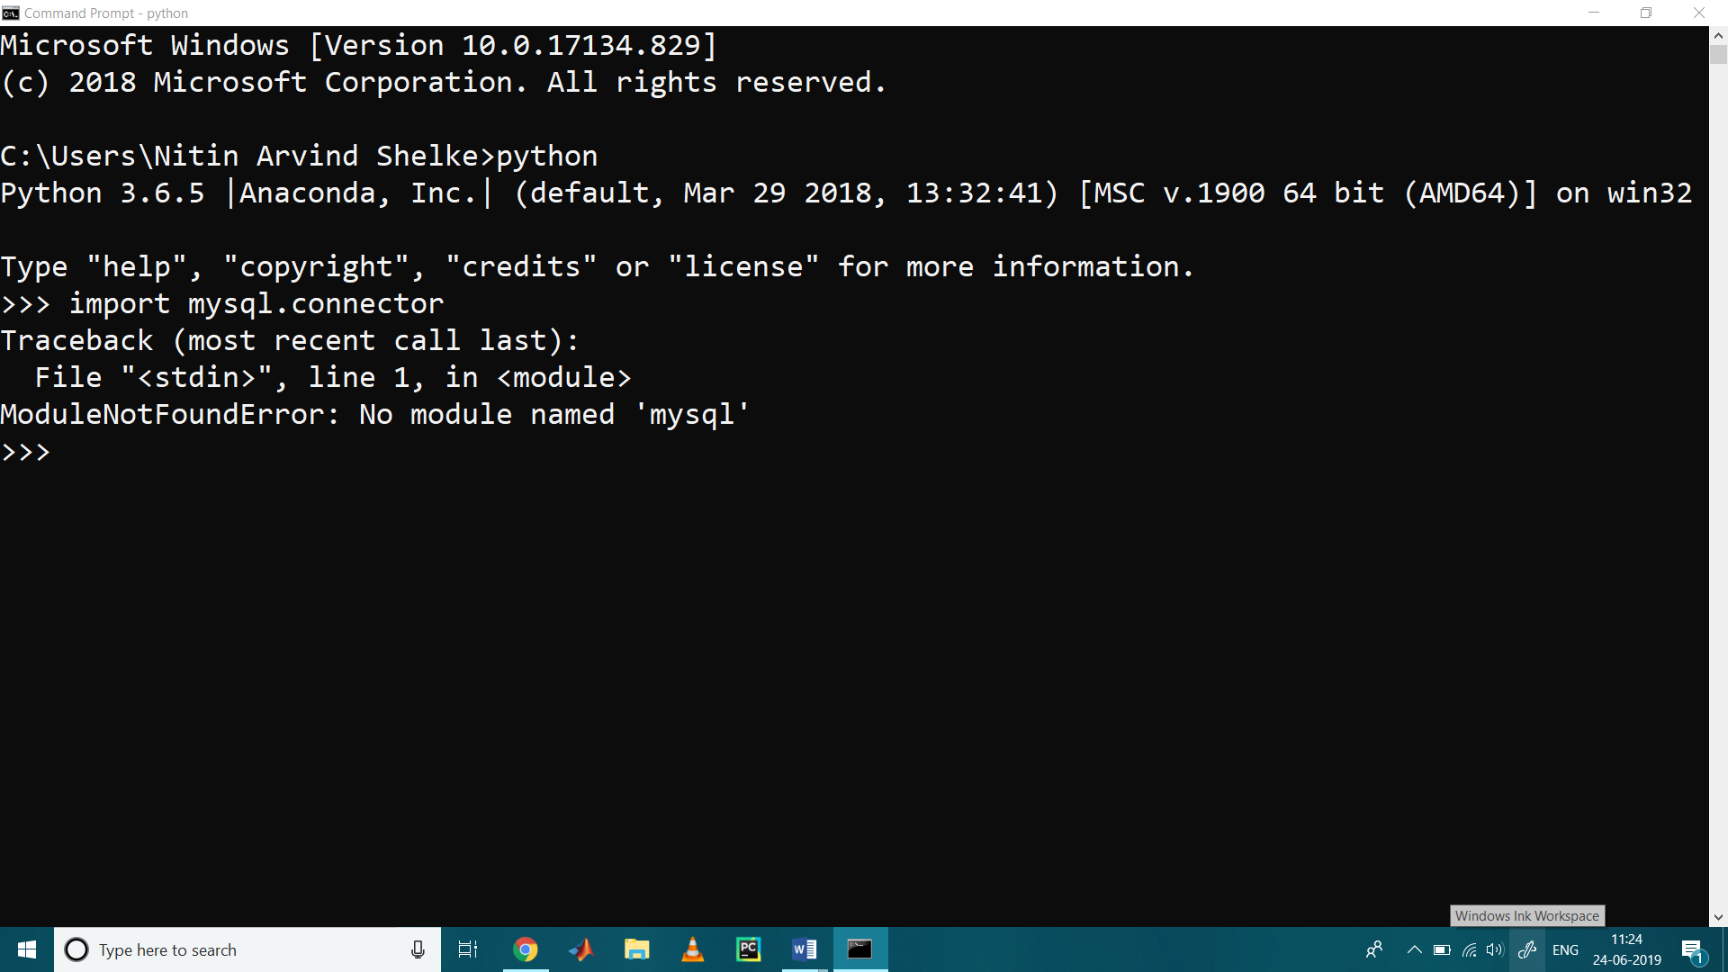
After typing this, we clearly say that No Module Named MySQL is present.
Then, we have to install MySQL. Python needs a MySQL driver to access the MySQL database.
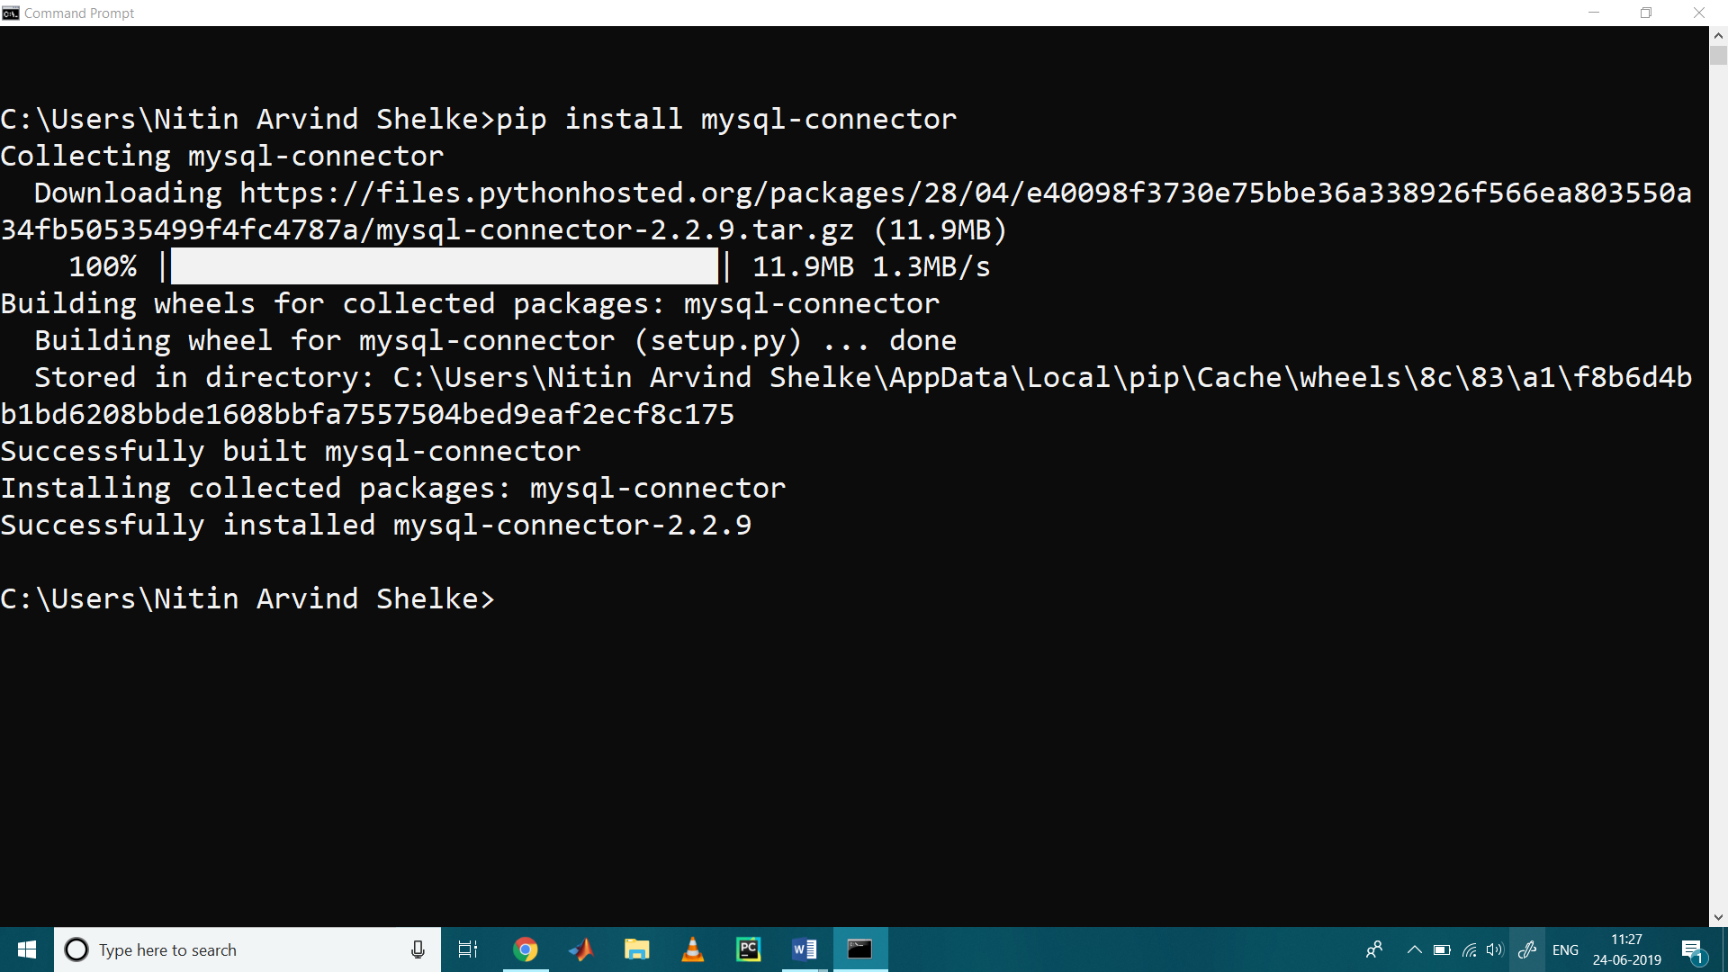
So, next, we download the mysql-connector with the use of pip.
C:\Users\Nitin Arvind Shelke>pip install mysql-connector
After installation, we test whether it works or not. Lets check with the following command:
>>> import mysql.connector
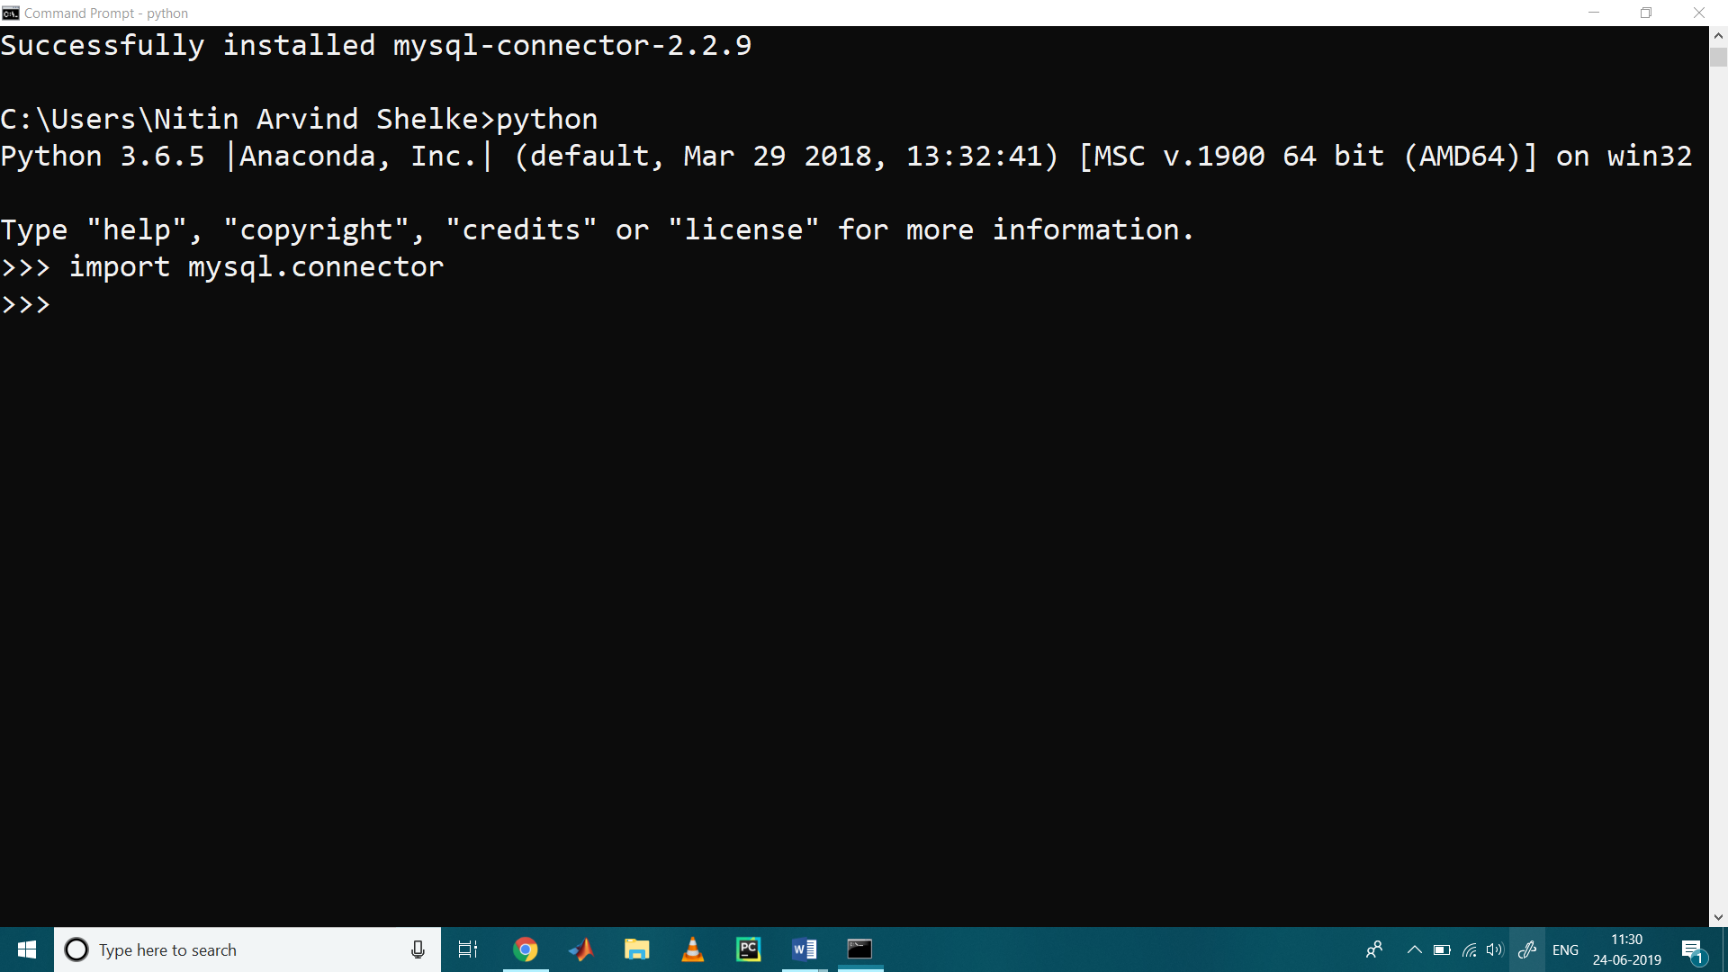
The above line imports the MySQL Connector Python module in your program, so you can use this module’s API to connect MySQL.
If the above code was executed with no errors, we can say that “MySQL Connector” is installed properly and get ready to use it.
>>>from mysql.connector import Error
The MySQL connector error object is used to show us an error when we failed to connect databases or if any other database error occurred while working with the database.
Creating a Connection to the Database
After installing the MySQL Python connector, we need to test it to make sure that it is working correctly, and you can connect to the MySQL database server without any problems. To verify the installation, use the following steps:
Type the following line of code:
>>> import mysql.connector
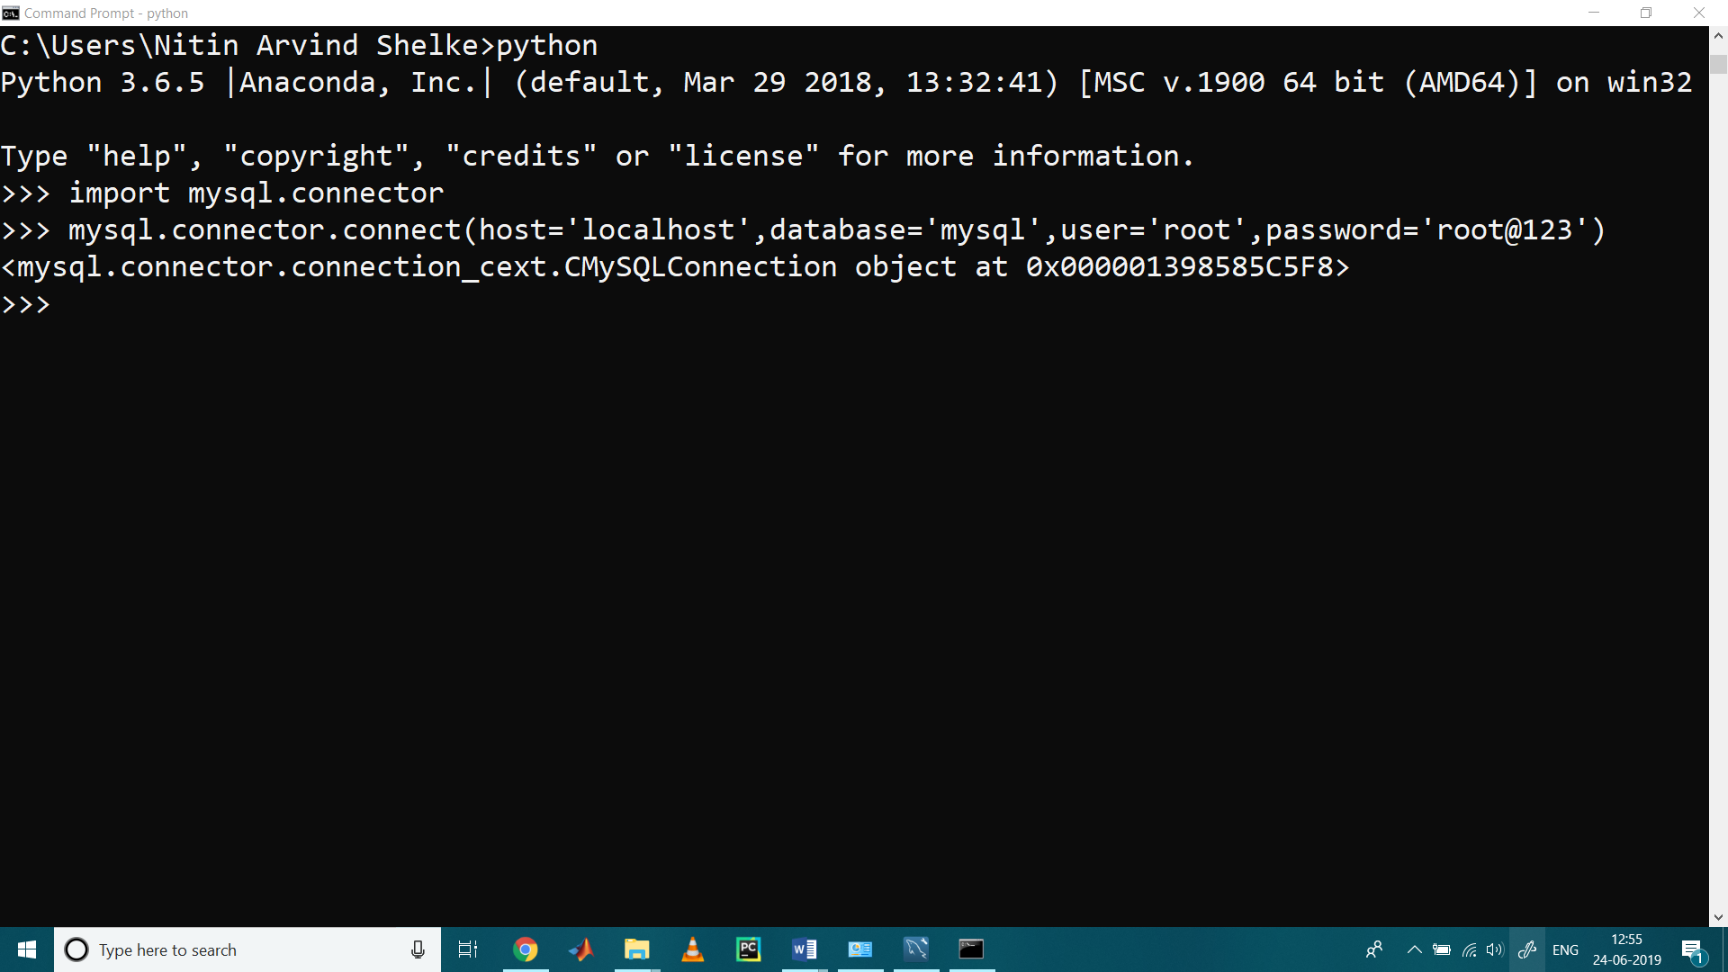
To establish a connection to the database we should know the following parameters,
Host= localhost (In general it is same for all)
Database=mysql (You can set as per your wish)
User=root (It is a username)
Password= root@123 (password set by me while installation of MyQL)
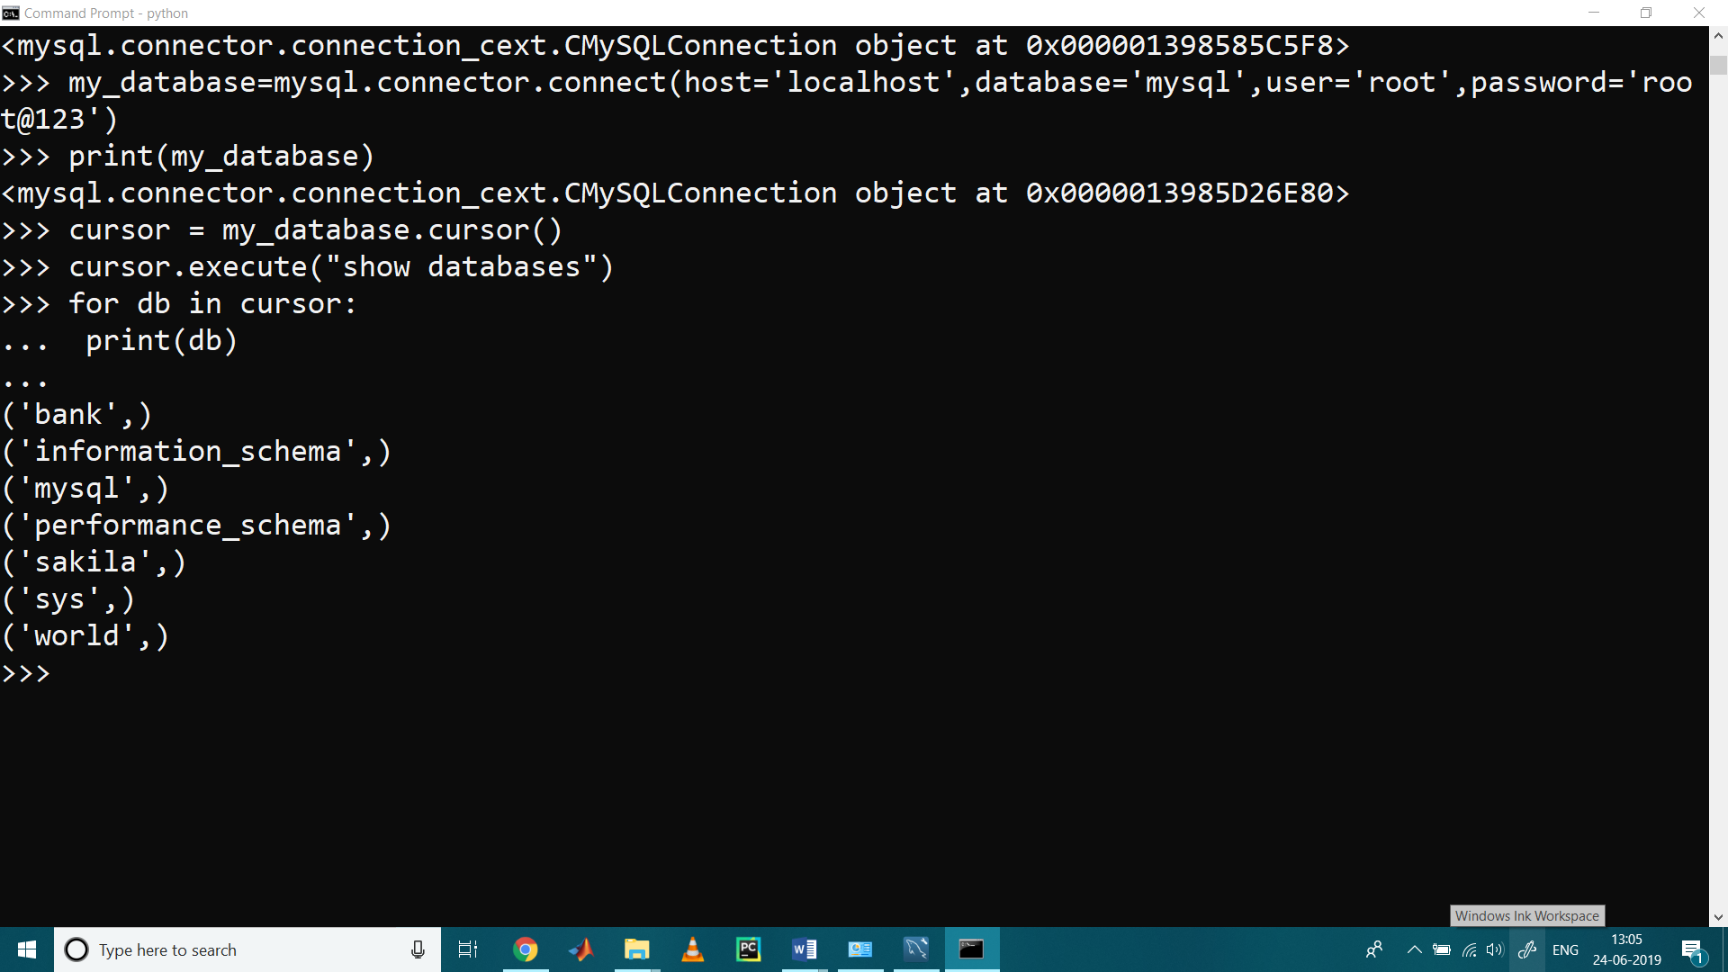
>>> mysql.connector.connect( host = 'localhost', database = 'mysql', user = 'root', password = 'root@123')
Show the Available Database
You can check if a database exists on your system by listing all the databases in your system by using the “SHOW DATABASES” statement:
>>> my_database = mysql.connector.connect( host = 'localhost', database = 'mysql', user = 'root', password = 'root@123')
>>> cursor = my_database.cursor()
>>> cursor.execute( " show databases " )
>>> for db in cursor:
... print(db)
...
Output
('bank',)
('information_schema',)
('mysql',)
('performance_schema',)
('sakila',)
('sys',)
('world',)
>>>
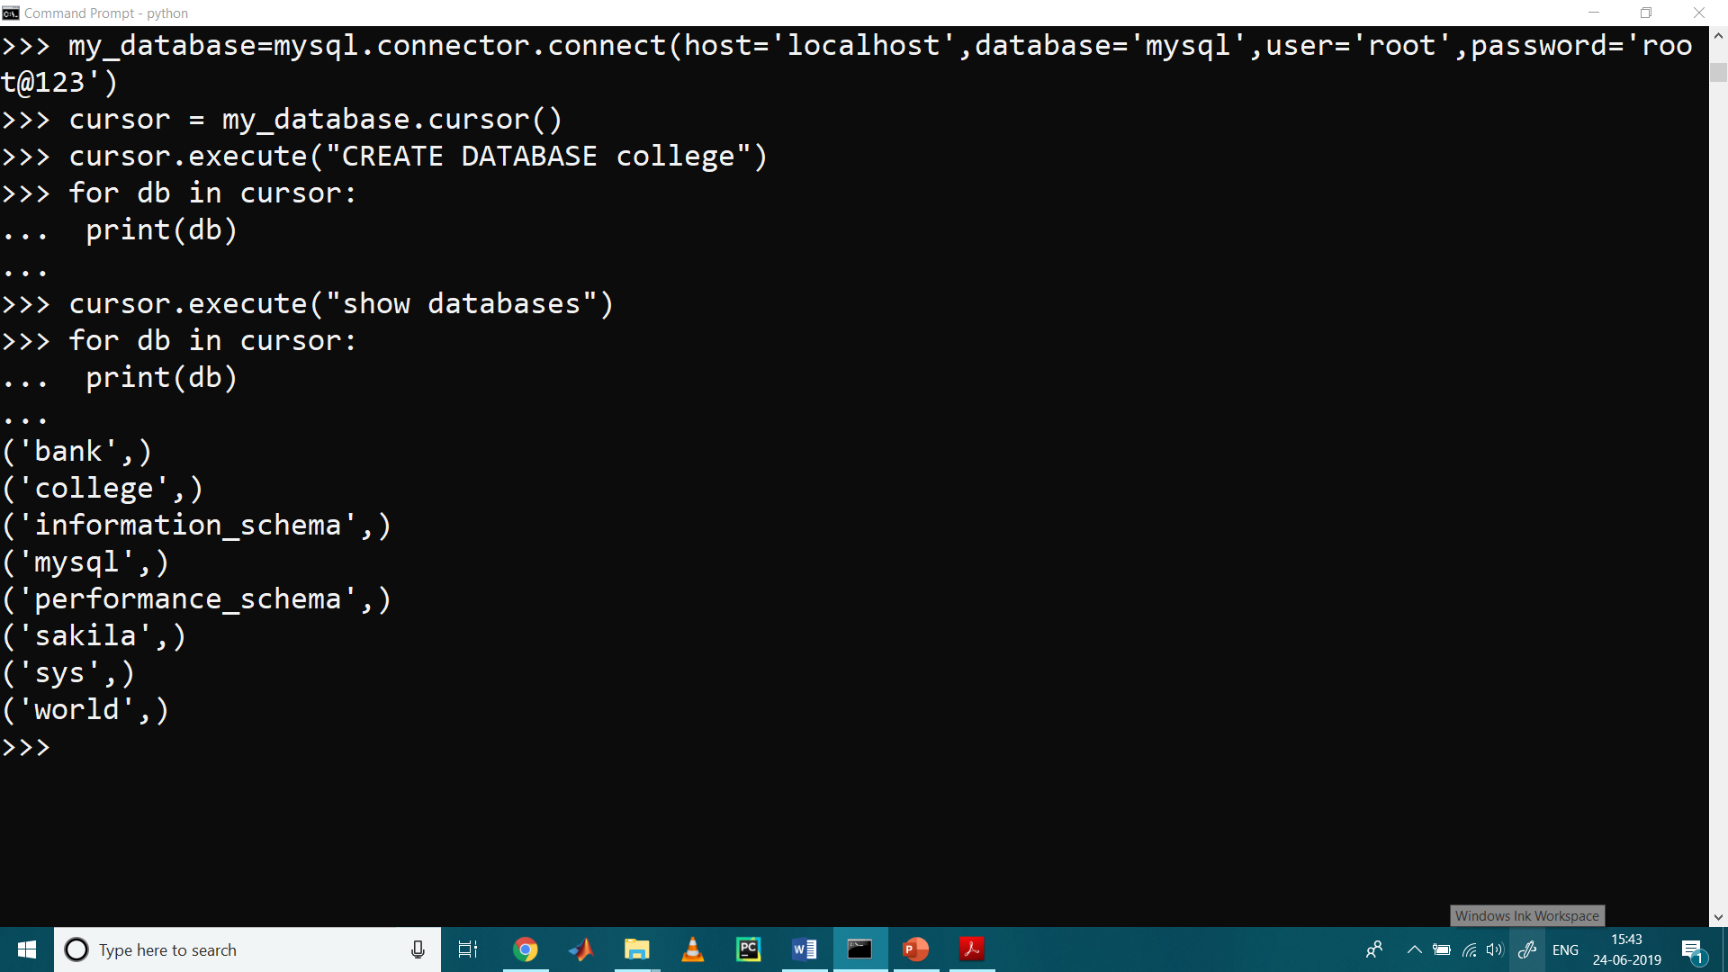
Creating a Database
To create a database in MySQL, we use the “CREATE DATABASE” statement to create the database named “college”:
>>> my_database = mysql.connector.connect( host = 'localhost', user = 'root', password = 'root@123' )
>>> cursor = my_database.cursor()
>>> cursor.execute( " CREATE DATABASE college " )
>>> for db in cursor:
... print(db)
...
>>> cursor.execute( " show databases " )
>>> for db in cursor:
... print(db)
...
Creating the Tables
Next, we create the tables for the ‘college’ database.
It is compulsory to define the name of the database while creating the tables for it.
Syntax to create the table is
create table_name(
column 1 datatype,
column 2 datatype,
column 3 datatype,
…………………………………………,
column n datatype
)
Let’s create the table students, department, and faculty for the database college.
>>> my_database = mysql.connector.connect ( host = 'localhost', database = 'college', user = 'root', password = 'root@123' )
>>> cursor = my_database.cursor()
>>>cursor. execute( " CREATE TABLE students ( stud_id varchar(200), stud_name VARCHAR(215), address VARCHAR(215), city char(100)) " )
>>> cursor. execute( " CREATE TABLE department ( dept_id varchar(200), dept_name VARCHAR(215)) " )
>>> cursor.execute( "CREATE TABLE faculty ( faculty_id varchar(200),faculty_name VARCHAR(215) )" )
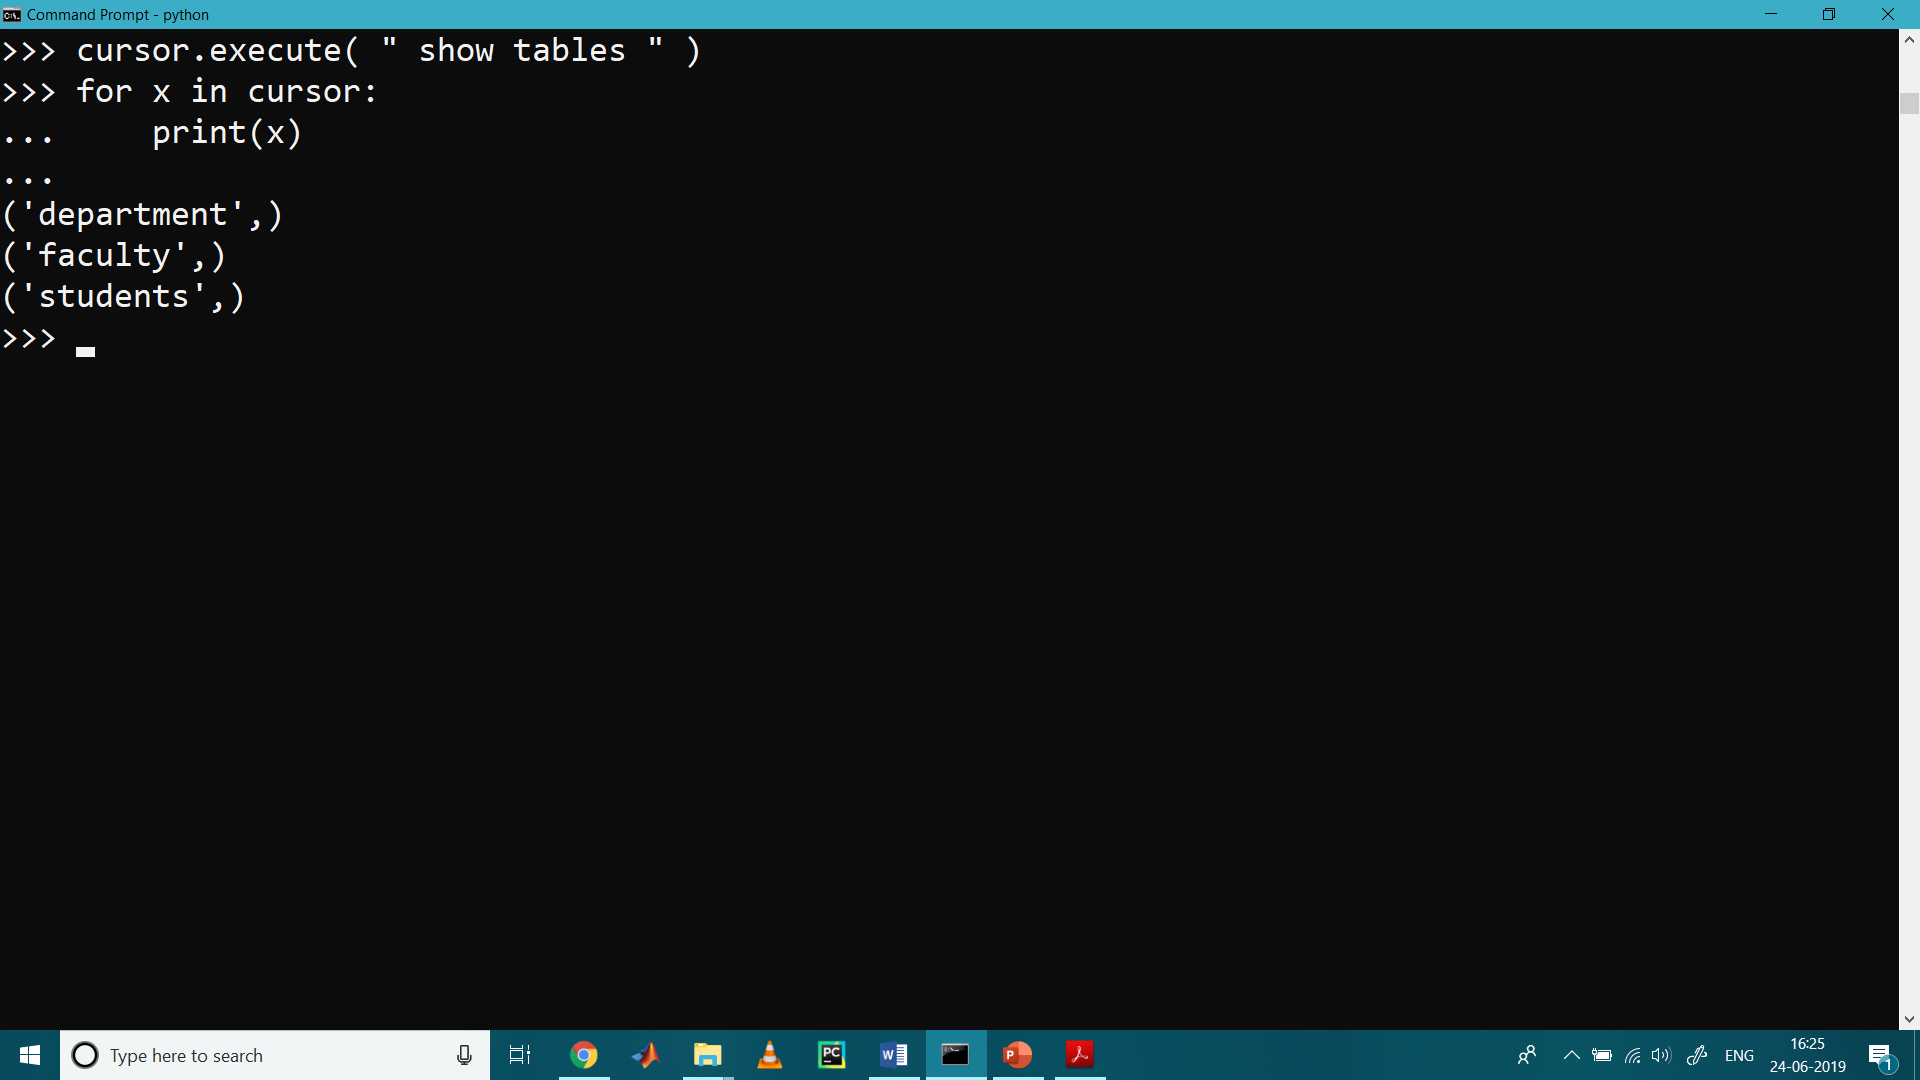
Show the Tables
To display the tables, we will have to use the “SHOW TABLES”
The following code displays all the tables present in the database “college”
>>> cursor. execute ( " SHOW TABLES " )
>>> for x in cursor:
... print(x)
...
('department',)
('faculty',)
('students',)
Assign Primary Key in Table
Primary key: It is a minimal set of attributes (columns) in a table or relation that can uniquely identify tuples (rows) in that table.
For example, Student (Stud_Roll_No, Stud_Name, Addr)
In the student relation, attribute Stud_Roll_No alone is a primary key, as each student has a unique id that can identify the student record in the table.
>>> my_database = mysql.connector.connect ( host = 'localhost', database = 'college', user = 'root', password = 'root@123' )
>>> cursor = my_database.cursor()
>>>cursor. execute( " CREATE TABLE students2 ( stud_id varchar(200) PRIMARY KEY, stud_name VARCHAR(215), address VARCHAR(215), city char(100)) " )
If the table already exists, use the ALTER TABLE keyword:
>>> my_database = mysql.connector.connect ( host = 'localhost', database = 'college', user = 'root', password = 'root@123' )
>>> cursor = my_database.cursor()
>>>cursor.execute( " ALTER TABLE student ADD COLUMN id INT AUTO_INCREMENT PRIMARY KEY " )
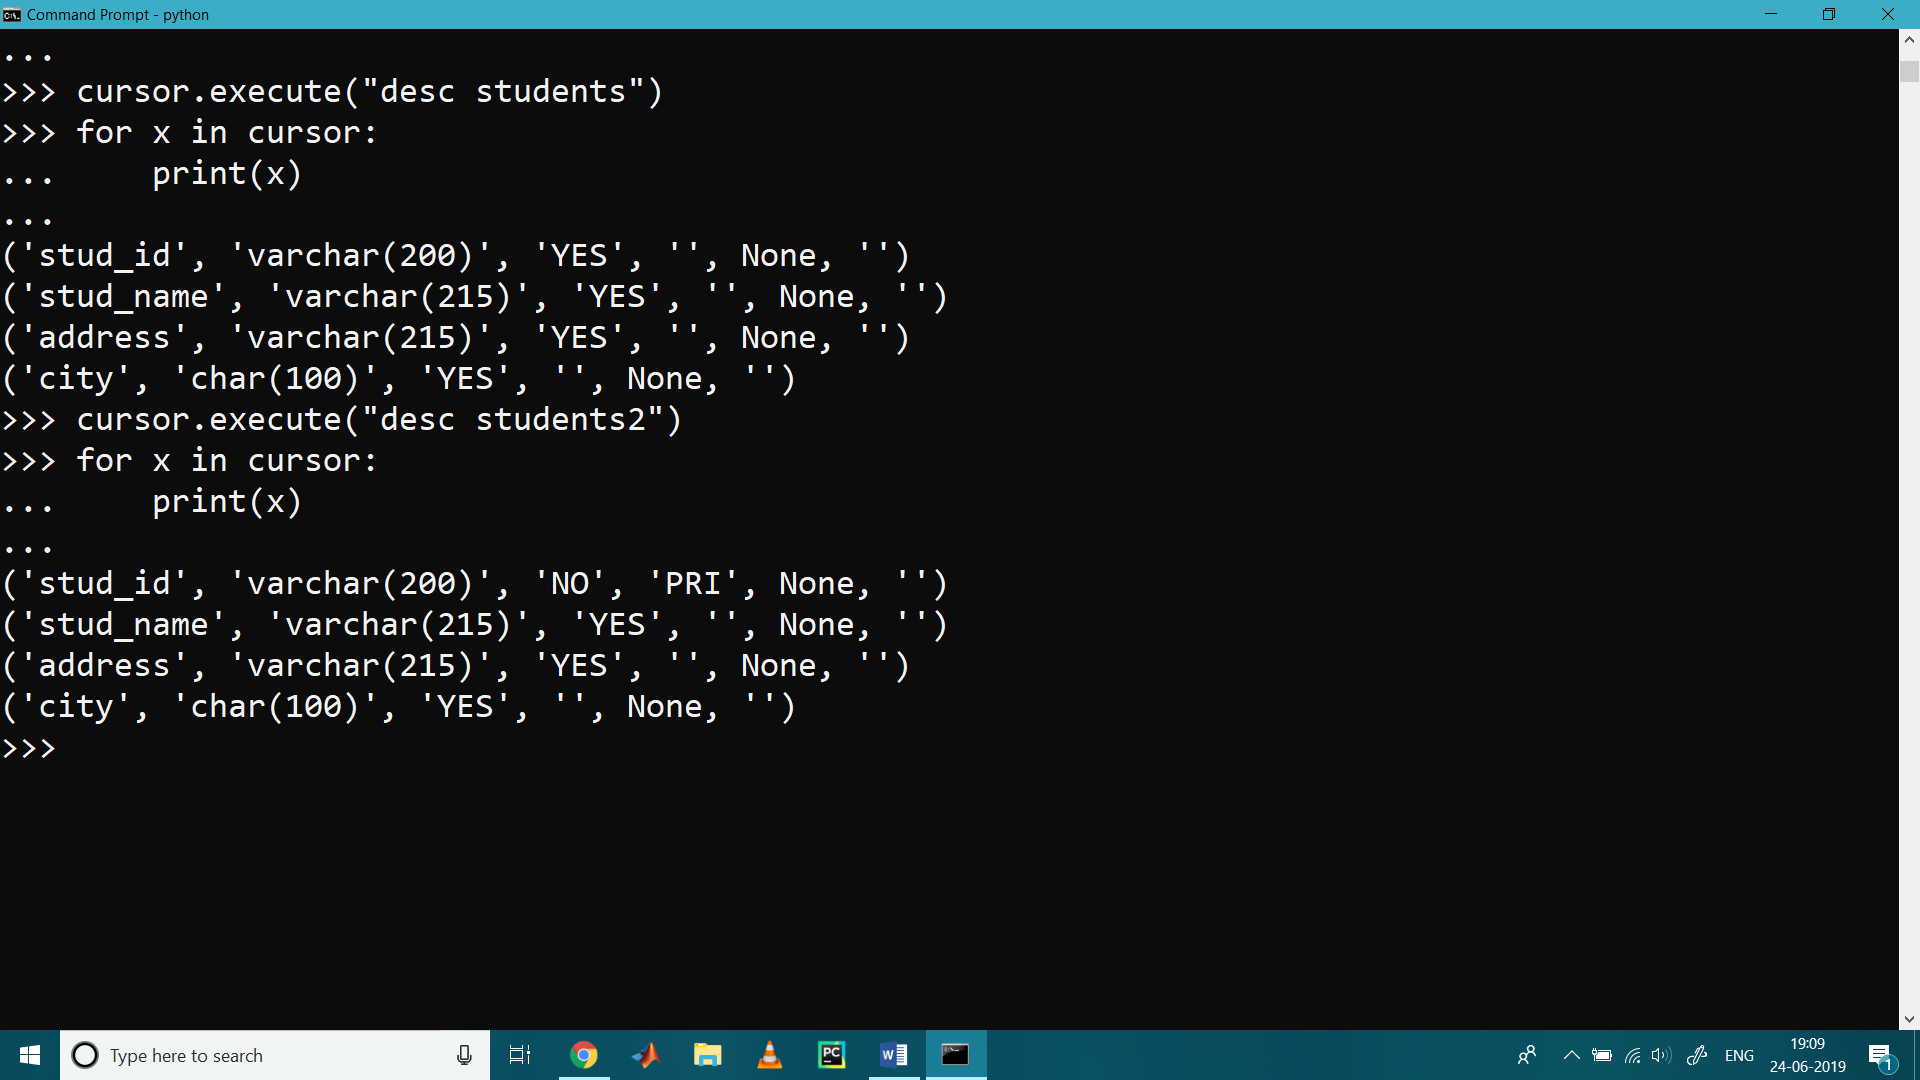
Describe the Created Tables
Desc keyword is used to describe the table in MySQL.
The following code describes the students table from the college database:
>>> cursor.execute("desc students")
>>> for x in cursor:
... print(x)
...
('stud_id', 'varchar(200)', 'YES', '', None, '')
('stud_name', 'varchar(215)', 'YES', '', None, '')
('address', 'varchar(215)', 'YES', '', None, '')
('city', 'char(100)', 'YES', '', None, '')
>>>
Example 2
The following code describes the students2 (where stud_id is mentioned as primary key) table from the college database:
>>> cursor.execute("desc students2")
>>> for x in cursor:
... print(x)
...
('stud_id', 'varchar(200)', 'NO', 'PRI', None, '')
('stud_name', 'varchar(215)', 'YES', '', None, '')
('address', 'varchar(215)', 'YES', '', None, '')
('city', 'char(100)', 'YES', '', None, '')
>>>
Insert Data Into the Table
To insert the data into the table, the “insert into” statement is used.
Let’s insert the data into the students table of the college database,
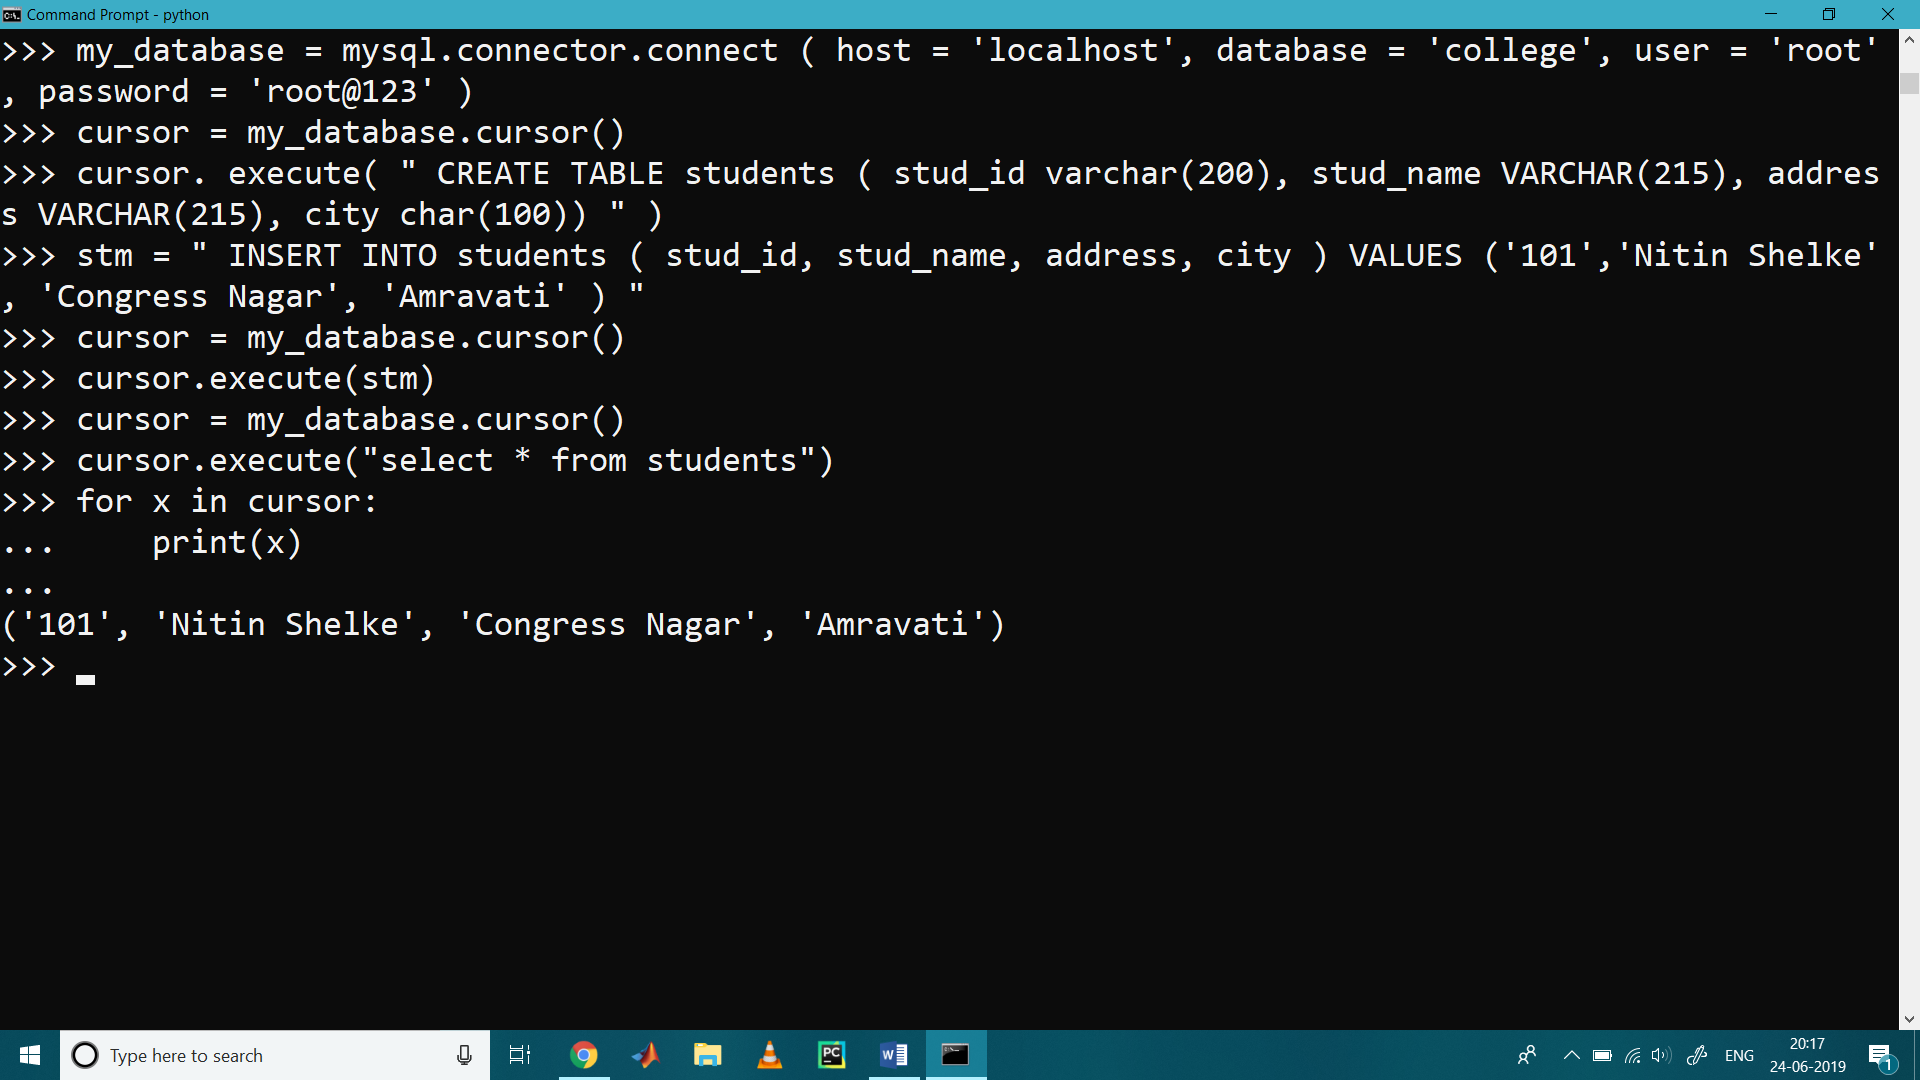
>>> my_database = mysql.connector.connect ( host = 'localhost', database = 'college', user = 'root', password = 'root@123' )
>>> stm = " INSERT INTO students ( stud_id, stud_name, address, city ) VALUES ('101','Nitin Shelke', 'Congress Nagar', 'Amravati' ) "
>>> cursor = my_database.cursor()
>>> cursor.execute(stm)
Display or Select the Inserted Data From the Table
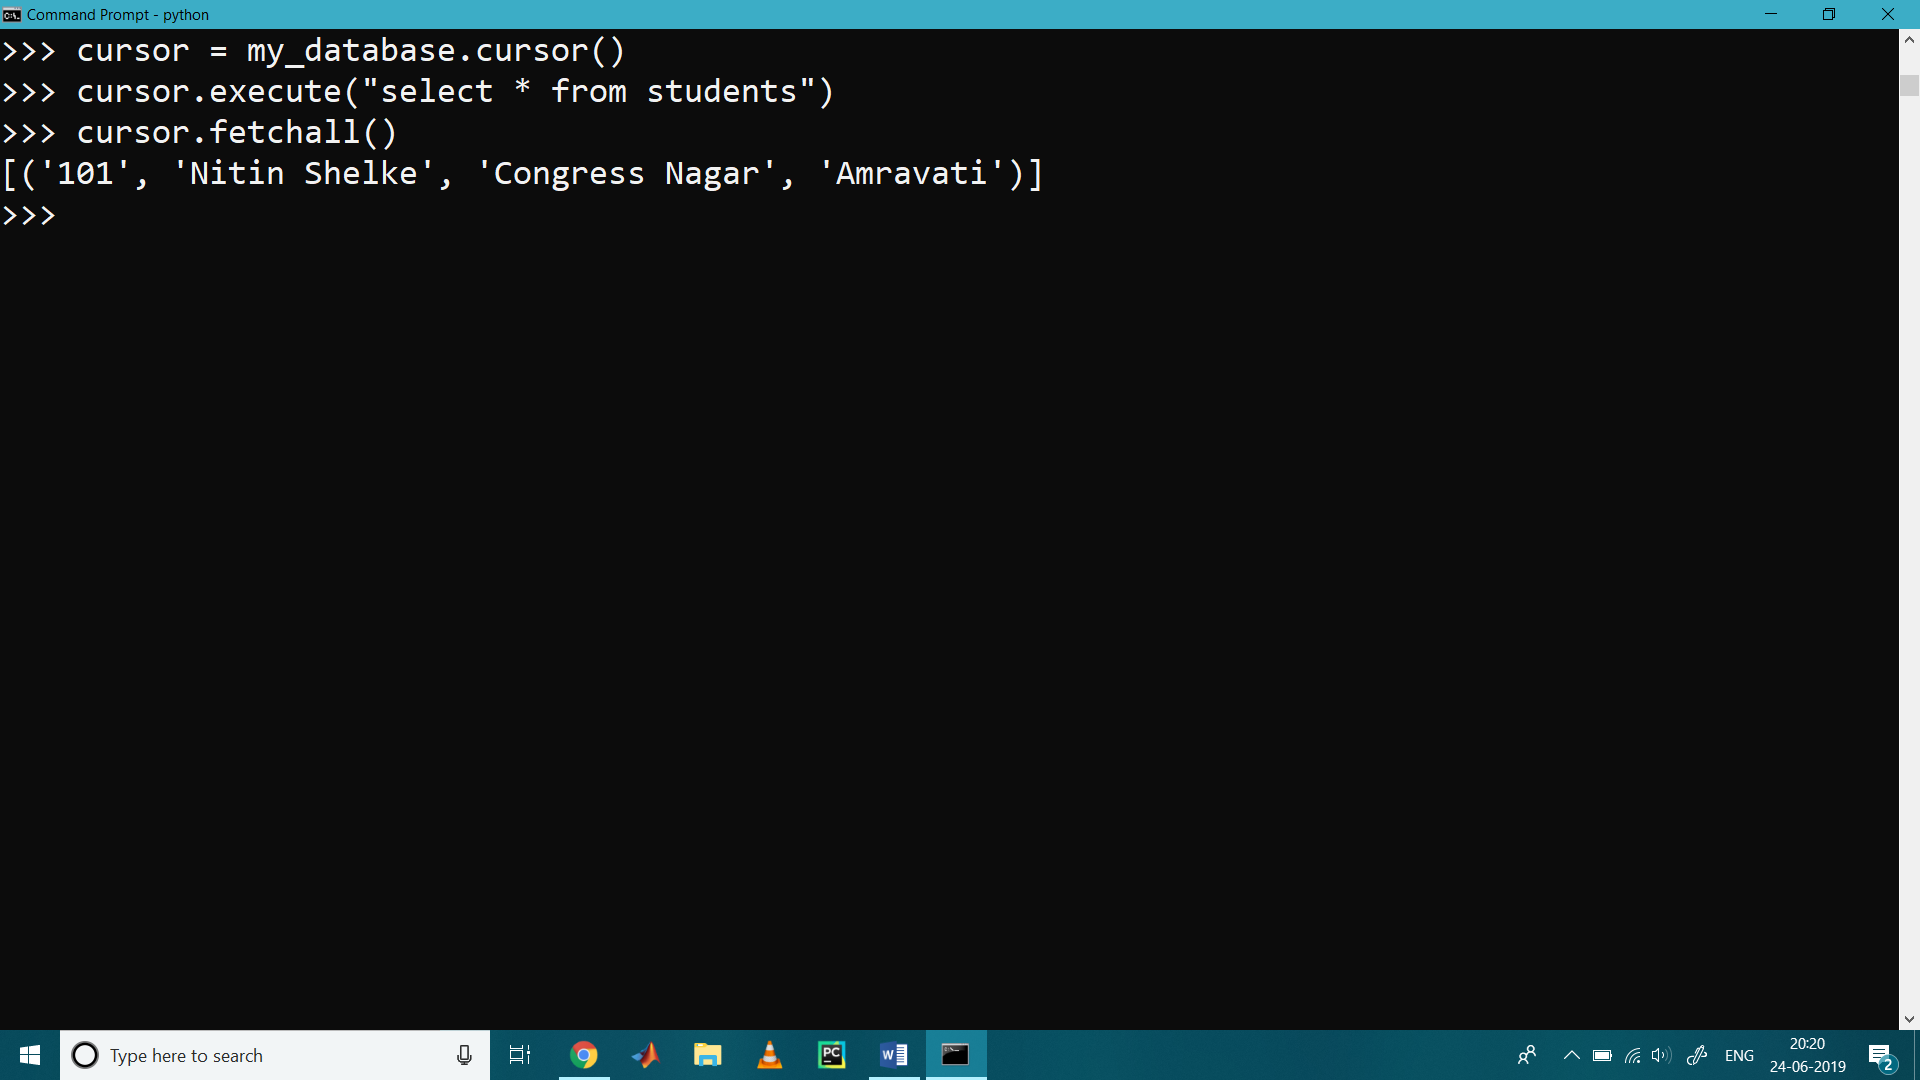
>>> cursor.execute(" select * from students")
>>> for x in cursor:
... print(x)
...
('101', 'Nitin Shelke', 'Congress Nagar', 'Amravati')
An alternate way is to use the fetchall() method.
>>> cursor.fetchall()
[(‘101’, ‘Nitin Shelke’, ‘Congress Nagar’, ‘Amravati’)]
Thanks for reading! Let me know your thoughts in the comments.
Source : https://dzone.com/articles/mysql-python
S